Mastering Temperature Management with Top and Bottom Vents
A systematic approach to managing airflow through top and bottom vents to precisely control cooking temperature in charcoal and wood-fired grills.
Method:
Mastering vent control is fundamental to successful grilling and smoking, as airflow is the primary mechanism for regulating temperature in charcoal and wood-fired cooking. By understanding how top and bottom vents work together, you can achieve precise temperature control regardless of weather conditions or the specific type of grill you're using.
Step 1:
Understand the basic principles of airflow in your grill. Bottom vents (intake vents) draw oxygen into the cooking chamber to feed the fire, while top vents (exhaust vents) release hot air and smoke. More open vents increase airflow and temperature; more closed vents restrict airflow and reduce temperature.
Step 2:
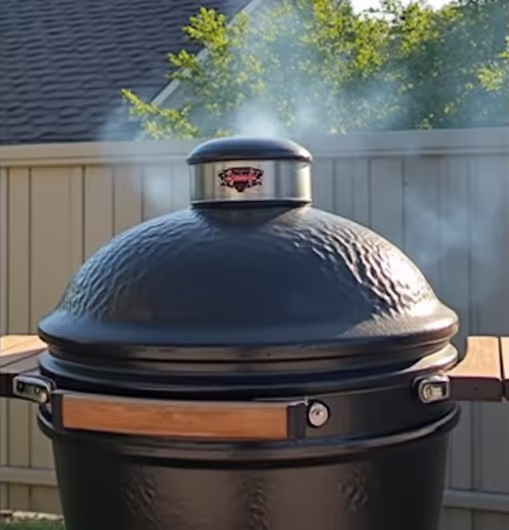
Begin with both vents fully open when lighting your charcoal or wood. This maximum airflow position allows for proper ignition and helps fuel reach its initial cooking temperature more quickly. Allow the grill to heat up for 10-15 minutes with vents fully open.
Step 3:
For high-heat grilling (230°C/450°F and above), keep both the top and bottom vents mostly to fully open. A good starting position is 75-100% open for both vents, which creates strong airflow and intense heat ideal for searing and direct grilling.
Step 4:
For medium-heat cooking (150-230°C/300-450°F), adjust the bottom vent to approximately 50% open and the top vent to 75% open. This balanced setting maintains steady airflow while preventing the temperature from climbing too high, perfect for indirect grilling of most meats and vegetables.
Step 5:
For low-temperature smoking (95-120°C/200-250°F), reduce the bottom vent to 25% open and the top vent to 50% open. These restricted settings limit oxygen flow to the fire, creating lower, sustained heat required for smoking and slow-cooking tougher cuts of meat.
Step 6:
Make gradual, small adjustments rather than dramatic changes. After adjusting vents, wait 10-15 minutes before making additional changes, as charcoal and wood cookers respond slowly to airflow modifications. Small, patient adjustments prevent overshooting your target temperature.
Step 7:
Use the bottom vent as your primary temperature control. Once you've established a good cooking environment, make most of your fine-tuning adjustments with the bottom vent while keeping the top vent in a consistent position. This method provides more predictable results than constantly changing both vents.
Step 8:
When finished cooking, close both vents completely to choke off oxygen supply, which will extinguish the fire while preserving unused charcoal for your next cook. Ensure vents are securely closed to prevent unexpected combustion during cooling.
Equipment Required:
Charcoal or Wood-Burning Grill with Adjustable Vents:
A kettle grill, kamado-style cooker, offset smoker, or any charcoal/wood grill that features adjustable top and bottom vents. Most quality charcoal grills include these features as standard.
Heat-Resistant Gloves:
Protective gloves rated for high temperatures to safely adjust vents during cooking when grill surfaces are hot. Silicone-coated options provide both heat protection and grip.
Grill Thermometer:
An accurate digital thermometer with probe to monitor grill temperature, preferably positioned at cooking grate level. Dual-probe models allow monitoring of both ambient grill temperature and internal food temperature simultaneously.
Notepad or Digital Log (Optional):
For recording vent settings and resulting temperatures to build personal reference guides for your specific equipment. Weather-resistant notepads or mobile apps designed for BBQ can be particularly useful.
Small Metal Tongs or Tool (Optional):
For making fine adjustments to vents without directly touching hot surfaces when precise, small movements are required.
Key Benefits:
Precise Temperature Control:
Achieve consistent temperatures suitable for your desired cooking method by properly managing airflow, allowing for reliable results across various techniques from low-and-slow smoking to high-heat searing.
Extended Fuel Efficiency:
Proper vent management can significantly extend charcoal or wood burn time, reducing fuel consumption and saving money while maintaining consistent cooking temperatures throughout longer cooks.
Versatile Cooking Methods:
Master the ability to create distinct heat zones and shift between high-heat grilling and low-temperature smoking on the same equipment without requiring additional accessories.
Improved Flavour Development:
Strategic vent control allows for optimal smoke circulation, enhancing food flavour without excessive smoke build-up that can create bitter or acrid taste profiles in finished dishes.
Reduced Flare-ups:
Properly managed airflow minimises oxygen surges that cause sudden temperature spikes and dangerous flare-ups, protecting both your food and safety while grilling.
Adaptability to Weather Conditions:
Develop skills to adjust vent settings to compensate for environmental factors like wind, ambient temperature, and humidity that would otherwise disrupt cooking consistency.
Tips and Tricks:
Weather Compensation Technique:
On windy days, position your grill with the bottom vent perpendicular to the wind direction to prevent excessive airflow. In cold weather, start with slightly more open vent positions than usual to compensate for faster heat loss from the cooking chamber.
The "Minion Method" Vent Strategy:
For long cooks, arrange unlit charcoal around the perimeter with lit charcoal in the centre, then use more restricted vent settings to create a slow burn that gradually ignites new fuel. This approach requires less vent adjustment during extended cooking sessions.
Humidity Control for Smoking:
Place a small water pan inside your grill when smoking and adjust your top vent to be slightly more open than usual. The moisture helps regulate temperature spikes while improving smoke adhesion to food surfaces, especially beneficial when cooking leaner meats.
Two-Zone Vent Management:
For simultaneous high/low heat zones, position your fuel on one side of the grill and adjust the bottom vent on that side to be more open than usual. This creates a temperature gradient across the cooking surface—useful for searing and then finishing thicker cuts of meat.
Oxygen Recovery Technique:
If temperatures drop too low during a cook, rather than fully opening vents (which can cause overshooting), open both vents 100% for exactly 60 seconds, then return to slightly more open than your previous setting. This provides a controlled oxygen boost without excessive temperature rise.
Visual Smoke Quality Assessment:
Use smoke appearance as a temperature indicator—thin blue smoke indicates proper combustion and temperature (ideal for cooking), while thick white smoke suggests incomplete combustion and too little airflow. Adjust bottom vents to achieve clean, barely visible blue smoke.
Common Mistakes:
Overreacting to Temperature Fluctuations:
Many beginners make dramatic vent adjustments in response to minor temperature changes, creating a cycle of overshooting and undershooting. Instead, accept that some variance is normal and make tiny adjustments only when the trend continues for more than 10 minutes.
Focusing Solely on Top Vent Control:
Relying exclusively on the top vent for temperature management limits precision. The top vent primarily affects smoke flavour and draft, while the bottom vent controls oxygen supply to the fire. Using both in coordination, with emphasis on the bottom vent for temperature, provides much finer control.
Neglecting Environmental Factors:
Failing to account for wind, ambient temperature, and humidity leads to inconsistent results. A vent setting that works perfectly on a calm, warm day will allow excessive heat loss on a cold, windy day. Adjust baseline vent settings according to weather conditions before beginning each cook.
Opening the Lid Frequently:
Each time you open the grill lid, you disrupt the carefully balanced airflow and temperature environment. This causes temperature drops followed by spikes when vents are open, as the fire receives a sudden oxygen surge. Limit lid openings to essential food turning or basting only.
Using Inconsistent Fuel Arrangements:
Scattered or randomly placed charcoal creates unpredictable airflow patterns that make vent control difficult. Always arrange fuel methodically—either in a concentrated pile, a ring, or in defined zones—to create predictable and controllable burn patterns that respond consistently to vent adjustments.
Troubleshooting
Problem: Temperature Climbs Uncontrollably Despite Closed Vents:
This usually indicates air leaks in your grill's body or lid. Apply high-temperature gasket material around lid edges and check for cracks or gaps in the construction. As a temporary solution, use aluminum foil to seal visible gaps and reduce airflow to problem areas. For kamado-style grills, inspect and replace the gasket sealing the lid if it appears worn or compressed.
Problem: Cannot Reach High Temperatures:
If your grill struggles to exceed higher temperatures despite fully open vents, first check for ash buildup restricting airflow beneath the coals. Clean out all ash from previous cooks and ensure the bottom vent is completely unobstructed. Also verify you're using sufficient fuel—higher temperatures require more initial charcoal volume, typically at least a full chimney starter's worth for a medium-sized grill.
Problem: Rapid Temperature Drops During Cooking:
Sudden temperature declines often indicate fuel depletion or starvation. Without opening the lid, try opening the bottom vent a bit more to increase oxygen flow. If temperatures continue dropping, you may need to add more charcoal. When adding fuel, always use pre-lit charcoal (lit in a chimney starter) to prevent significant temperature disruption and avoid the addition of unpleasant chemical flavours to your food.
Problem: Temperature Fluctuations in Windy Conditions:
Wind can dramatically affect airflow patterns and cause erratic temperature readings. Create a windbreak on the intake (bottom vent) side of your grill using a heat-resistant barrier. Additionally, partially close the bottom vent on the windward side to compensate for increased airflow, then adjust the top vent to be more closed than usual to maintain proper draw through the cooking chamber.
Problem: Different Temperature Readings Across the Grill Surface:
Uneven cooking temperatures indicate improper airflow distribution. For offset smokers, use tuning plates (flat metal sheets) to even out heat. For kettle grills, try the "half-moon" fuel arrangement with charcoal on one side and the bottom vent partially under the fuel bed. If using a kamado-style grill, add a heat deflector plate to distribute air more evenly around the ceramic walls.
Technique Adaptations
Adaptation for Kamado-Style Ceramic Grills:
Ceramic grills retain heat exceptionally well, making them more sensitive to vent changes. Use micro-adjustments and extend the waiting period between adjustments. For temperature stability in these highly-insulated environments, the bottom vent often needs to be only slightly open for low-and-slow cooking, with the top vent daisy wheel adjusted accordingly.
Adaptation for Offset Smokers:
Offset smokers require a modified approach due to their horizontal design. Keep the chimney (top) vent fully open in most scenarios and control temperature primarily with the firebox (intake) vent. To improve heat distribution, install a water pan at the transition point between the firebox and cooking chamber. For extreme low-temperature control, use the "coal-minion" method with just a few lit briquettes placed atop a bed of unlit charcoal.
Adaptation for Healthier Cooking with Less Smoke:
For those seeking reduced smoke exposure while maintaining flavour, begin with a higher-temperature burn (all vents open) for 10-15 minutes to establish clean combustion, then partially close vents to reach target temperature. This creates a cleaner burn with fewer volatile compounds and particulates. Additionally, position fatty foods away from direct dripping onto coals, which reduces harmful smoke production without sacrificing flavour development.
Adaptation for High-Altitude Cooking:
At higher elevations, reduced oxygen levels affect combustion efficiency. Compensate by using bottom vents more open than you would at sea level, while keeping top vents at standard settings. Due to lower air pressure, water boils at lower temperatures, so moisture evaporates more quickly from food—consider using a water pan to maintain humidity and prevent excessive drying during cooking.


